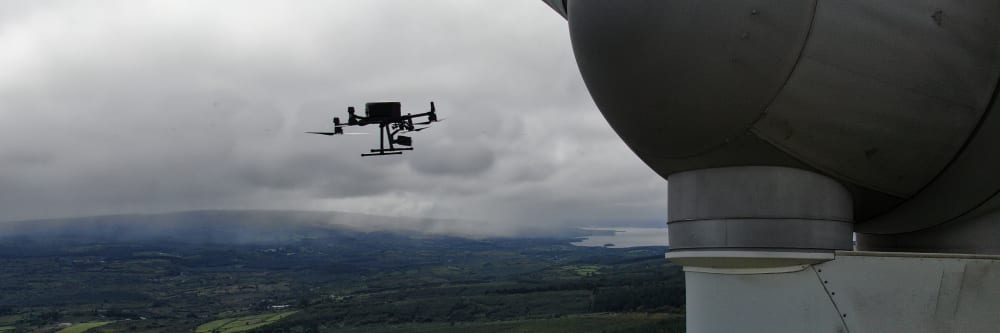
Rope access teams can take the better part of a day to inspect a single turbine, and the cost of the access equipment alone can exceed the cost of a full drone survey. A drone inspection surveys all three blades — leading edge, trailing edge, pressure side, suction side, and tip — in under an hour, without taking the turbine offline and with nobody working at height.
Every blade is photographed systematically using high-optical-zoom sensors flown parallel to the surface. Wide-angle lenses and digital zoom are not used — they dilute sensor resolution and compromise the data needed to make critical maintenance or warranty decisions. After the flight, every identified defect is classified on an industry-standard 1-to-5 severity scale and delivered as a structured report your maintenance team or insurer can act on directly.
Why use a drone instead of rope access for blade inspection?
Rope access requires a team of technicians working at height for hours per turbine, with the turbine shut down throughout. The access equipment alone can cost more than the entire drone survey. A drone can cover all three blades in 30 to 60 minutes with the turbine remaining online, and nobody is placed at risk working at height.
The imagery is also systematically organised: every photograph is filed by turbine number, blade number, blade face, and date. Rope access photography is typically handheld and unordered — post-flight sorting can take longer than the inspection itself.
Does the turbine need to be shut down during the inspection?
The turbine is paused briefly to bring each blade to the 12 o'clock position for photography, but it does not need to be taken offline or de-energised. The rotor is rotated between blade captures, and once all three blades have been inspected, the turbine resumes normal operation immediately.
This is important not just for generation revenue but for inspection quality. A blade inspected while stationary at 12 o'clock has a clean sky background, giving the photographer the best possible contrast to identify surface defects. A blade photographed against the ground or in motion loses that clarity.
Discuss your wind turbine inspection requirementsWhat can a drone actually see on a blade?
A drone equipped with a high-optical-zoom sensor flown parallel to the blade surface can identify leading edge erosion, surface cracks, delamination, coating failure, lightning strike damage, and blade tip damage. The same flight can also capture the nacelle exterior and tower for corrosion, panel condition, and structural anomalies.
Thermal imaging can add a further layer: delamination and subsurface voids that are invisible to the naked eye can show up as temperature differentials on a thermal camera, particularly on sunny days when the blade surface is warming unevenly.
More about thermal imaging for blade inspectionHow is the inspection data delivered?
Every inspection produces a structured PDF or platform-based report with high-resolution images of every identified anomaly, systematically organised by turbine number, blade number, blade face, and date. A raw spreadsheet formatted for direct import into your maintenance management system accompanies the visual report.
Every defect is assigned a specific classification string (for example, “severe leading edge erosion, underlying laminate exposed”) and graded on a 1-to-5 severity scale, from Category 1 (cosmetic only) to Category 5 (immediate risk of failure).
Discuss your inspection requirementsMany operators inspect turbines by locking one blade up and two down, flying around the entire rotor. This method yields poor photographic imagery for the lower blades due to background interference from the ground and sky.
The preferred approach is a strict vertical flight methodology: pause the turbine and inspect each blade only when it is pointing straight up at the 12 o'clock position. This satisfies two critical engineering requirements:
The sky acts as a clear, uniform background behind the blade at all times, resulting in superior high-resolution imagery with maximum contrast for defect identification.
Flying around a vertically isolated blade removes surrounding collision hazards, creating a highly safe flight profile with no obstacles in the flight path.
Why inspect only one blade at a time?
When all three blades are inspected in one rotor position, the lower blades are photographed against the ground — a cluttered background of fields, trees, or infrastructure that reduces contrast and makes defects harder to see. Inspecting each blade individually at 12 o'clock guarantees a clean sky background behind every photograph.
The rotor is simply paused and rotated between blade captures. The entire process — all three blades, one at a time — is typically completed in under an hour.
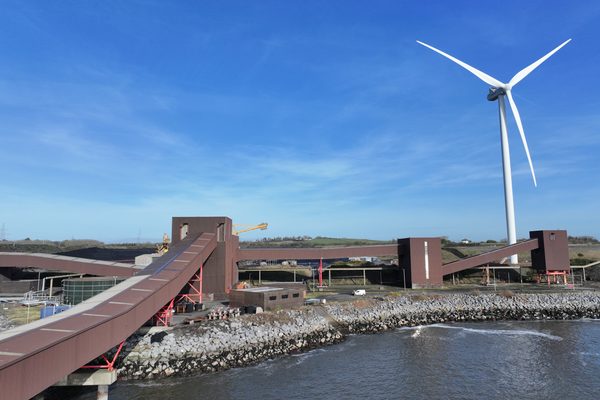
The flight begins with a baseline image of the hub to establish hub height, followed by vertical flight paths parallel to the blade — up the leading edge, down the pressure side, up the suction side, and down the trailing edge. Flying parallel to the surface keeps the data sequentially grouped and greatly reduces the need for complex sorting post-flight.
To accurately identify defects such as delamination, lightning strikes, or leading edge erosion, the inspection relies exclusively on high-optical-zoom sensors. Wide-angle lenses and digital zoom are not used — they dilute sensor resolution and compromise the data required to make critical maintenance or warranty decisions.
Why optical zoom instead of flying closer to the blade?
Flying closer introduces collision risk without improving image quality. A high-optical-zoom sensor flown at a safe standoff distance can resolve cracks and erosion patterns a few millimetres across while keeping the drone well clear of the blade. Optical zoom magnifies the image using the lens itself — unlike digital zoom, which crops and enlarges pixels, losing real resolution.
The standoff distance also means the drone can operate safely in the turbulent airflow around an operating turbine without risk of being drawn into the rotor.
See the camera payloads used for blade inspection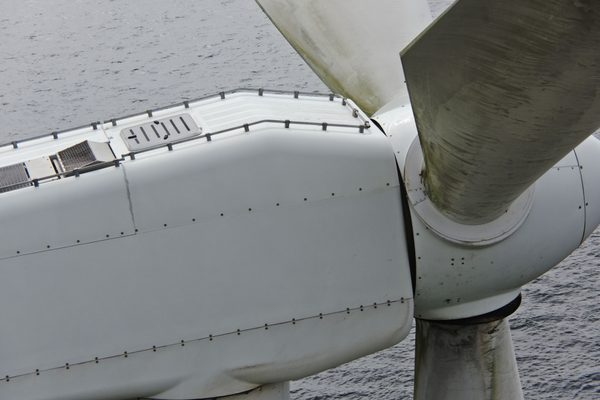
Data is only useful if it is organised. All imagery is systematically categorised by turbine number, blade number, blade face, and date.
The deliverable is a comprehensive PDF or platform-based report featuring high-resolution images of every identified anomaly. Alongside the visual data, a raw spreadsheet formatted for direct import into a maintenance management system is supplied. Every defect is assigned a specific classification string (for example, “severe leading edge erosion, underlying laminate exposed”) and graded on an industry-standard 1-to-5 scale:
Entirely cosmetic. Provided for information purposes.
Minor defect. Address during scheduled maintenance.
Moderate defect. Recommended to address within six months.
Serious defect. Requires attention within three months.
Severe defect. Immediate risk to the asset or personnel, such as a split trailing edge with catastrophic failure potential.
How does the 1-to-5 severity scale help with maintenance planning?
The severity scale turns a pile of photographs into a prioritised work schedule. A Category 5 defect (split trailing edge, imminent failure risk) is flagged for immediate attention. A Category 2 defect (minor erosion, no structural concern) is noted for the next scheduled maintenance window and not before.
This means your maintenance team does not need to interpret the imagery themselves to decide what to fix first. The report does that work. The spreadsheet can be imported directly into most maintenance management systems, and every defect is GPS-tagged so the repair team knows exactly where on the blade to look.
Discuss your reporting requirements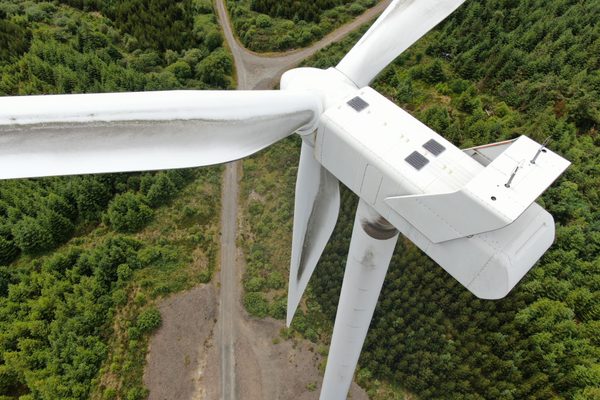
No technicians working at height, no rope access equipment, no associated permit requirements. The drone flies the blade from a safe standoff distance while the turbine remains online.
The rotor is paused briefly to position each blade at 12 o'clock for photography, but the turbine is not taken offline or de-energised. Generation resumes immediately after the inspection.
High-optical-zoom sensors flown parallel to the blade surface resolve cracks and erosion patterns a few millimetres across. Wide-angle lenses and digital zoom are not used — they dilute real sensor resolution.
Each blade is photographed individually at the vertical position, with a clean sky background behind every image. No ground clutter, no background interference, maximum contrast for defect identification.
Every photograph is filed by turbine number, blade number, blade face, and date. No unordered handheld photography to sort through after the inspection.
Every defect is graded from Category 1 (cosmetic) to Category 5 (immediate failure risk), giving your maintenance team a prioritised work schedule they can act on directly.
A rope access team can take the better part of a day to inspect a single turbine, and the access equipment alone can cost more than the entire drone survey. A drone surveys all three blades — leading edge, trailing edge, pressure side, suction side, and tip — in under an hour. The 12 o'clock flight profile means every photograph has a clean sky background, and vertical flight paths parallel to the blade surface keep the data sequentially grouped with minimal post-flight sorting.
The output is not a memory card of unsorted photographs. Every image is filed by turbine number, blade number, blade face, and date. Every identified defect is assigned a specific classification string and graded on the 1-to-5 severity scale, from Category 1 (cosmetic, noted for information) to Category 5 (severe, immediate risk of failure). The accompanying spreadsheet is formatted for direct import into most maintenance management systems, and every defect is GPS-tagged so the repair team can locate it on the blade without guesswork.
Every client's reporting requirements are different. An insurer may need timestamped evidence of blade condition at a specific date. An asset manager may need a prioritised spreadsheet for a maintenance contractor. An OEM may need imagery organised to their specific warranty claim format.
A typical wind turbine inspection delivers a full photographic survey of all three blades, nacelle, and tower; an annotated defect report with high-resolution imagery of every identified anomaly; a raw spreadsheet with every defect classified by type, location, and severity; and GPS-tagged imagery referenced to turbine and blade position. All imagery is systematically organised by turbine number, blade number, blade face, and date — no unordered photography, no post-flight sorting burden on your team.
The defect classification report categorises every finding on the 1-to-5 severity scale, with each defect described in plain English (for example, “severe leading edge erosion, underlying laminate exposed”). The result is not a pile of images — it is a prioritised maintenance schedule your team or contractor can act on directly.
Every blade face captured systematically with optical zoom from a parallel flight path — no wide-angle, no digital zoom, no unordered handheld shots.
Every identified anomaly documented with a specific classification string and severity grade, presented in a structured PDF or platform-based report.
Raw data formatted for direct import into your maintenance management system, with every defect categorised and prioritised on the 1-to-5 scale.
Every defect located on the blade by GPS coordinates so your repair team can find it in the field without guesswork.
Working at height on wind turbines in Ireland is governed by the Safety, Health and Welfare at Work (Work at Height) Regulations 2006 (S.I. No. 318 of 2006). This framework requires that work at height be avoided where it is reasonably practicable to achieve the work purpose without it. Drone inspection of turbine blades satisfies this duty at the first step of the hierarchy of control — nobody works at height because nobody needs to leave the ground.
Does a drone inspection satisfy the work at height regulations?
Yes. Regulation 5 of S.I. No. 318/2006 requires that work at height be avoided where reasonably practicable. A drone inspection surveys the full blade length from the ground with nobody elevated, nobody on ropes, and nobody on the nacelle. The duty to avoid work at height is satisfied directly — the inspection is completed without anyone leaving the ground.
Learn about our approach to health and safety S.I. No. 318/2006 — Work at Height Regulations (Irish Statute Book)What aviation regulations apply to drone inspection of wind turbines?
All drone operations in Ireland are regulated by the Irish Aviation Authority under S.I. No. 24 of 2023, which implements the European Union Aviation Safety Agency (EASA) framework. Engineers with Drones holds a Specific Category Operational Authorisation (IRL.UAS.AUTH1002) issued by the IAA, permitting operations beyond the Standard Scenarios defined under the EASA framework.
Wind turbine inspections are conducted within this authorisation. The operational risk assessment accounts for the turbine height, the proximity of the drone to the structure, and the surrounding terrain. The flight is conducted within visual line of sight, with the pilot positioned to maintain a clear view of the drone and the blade at all times.
More about our regulatory complianceWhat is required if rope access cannot be avoided?
Where work at height is unavoidable, S.I. No. 318/2006 requires that the work be properly planned, appropriately supervised, and carried out in a manner that is so far as is reasonably practicable safe. This includes selecting the correct work equipment for the task, ensuring that anyone working at height is competent, and putting measures in place to prevent falls.
The key point is that drone inspection removes the need for this entire regulatory chain. No work at height, no permit, no rope access team, no rescue plan — because nobody is elevated in the first place.
Learn about our approach to HSSEComplex surveys and inspections require more than just a pilot. Our engineers can help you scope your requirements and indentify the right approach.