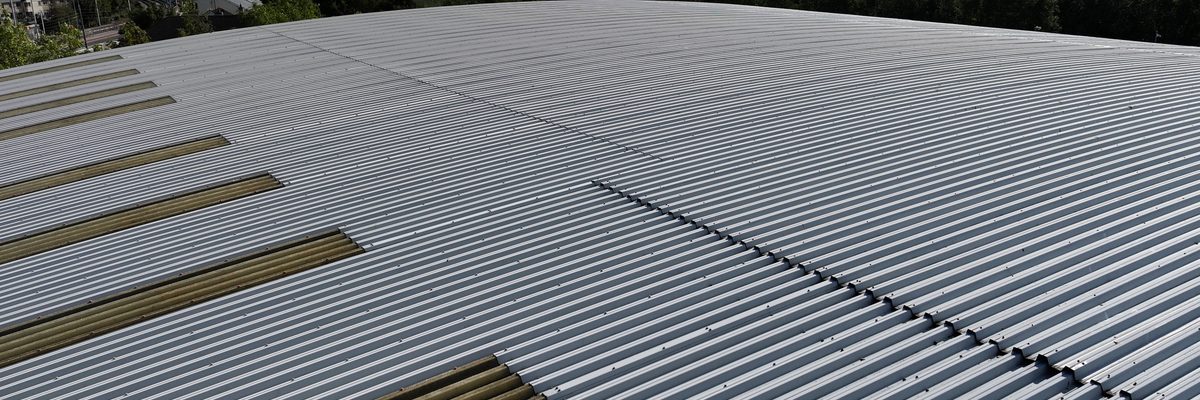
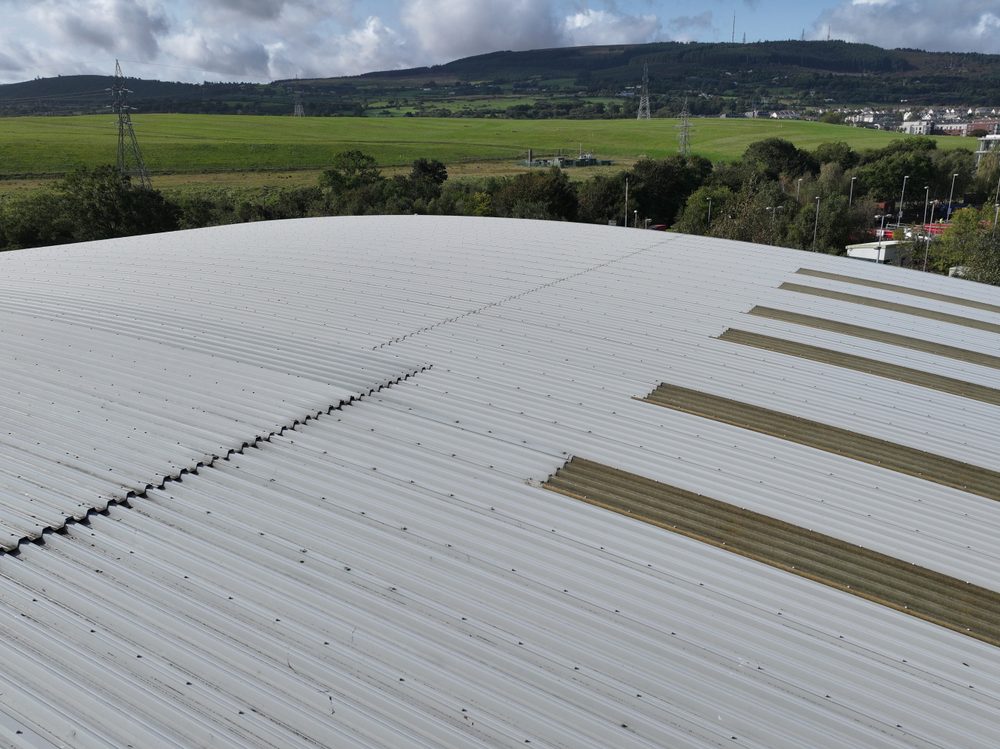
Aerial view along the roof of a large Dublin warehouse, with bands of translucent roof panels set into the sheeting

Roof inspection at a Dublin warehouse

The roof was surveyed from the air, then from inside the building, to establish exactly where the water was getting in.
Overview

The Job at a Glance

The building, a large warehouse in Dublin, remained in full use. While the original roof and walls were structurally sound, they had begun to leak in places.

Large Dublin warehouse

An occupied warehouse with the original roof structure and walls still in place, in full use throughout the inspection.

Small drone with optical zoom

Flown from a position away from people to keep ground risk low, with the zoom lens capturing close detail from a distance.

External and internal survey

A second drone was flown inside the building, close to the roof, to locate ingress points that were difficult to find from outside.

Leak report with detailed imagery

Detailed imagery of every issue identified, processed into a report and presented to the client.

The challenge

A building that could not be closed for an inspection

The building, a large warehouse in Dublin, remained in full use throughout. The original roof structure and walls were structurally sound, but had begun to leak in places.

Engineers With Drones was asked to come in and look at whether the leaks could be isolated. Water was appearing inside the building in specific places, but the inside of a building tells you very little about which roof detail is letting the water in. Water travels, and by the time it shows up on a ceiling or on a floor it can be a long way from the defect that let it in. Answering the question properly means looking at the roof itself.

The building was occupied throughout, which ruled out the usual approaches to a roof survey. Scaffolding, a mobile elevating work platform or a ladder would all have meant cordoning off parts of a building that was in daily use, and working around the people in it.

Aerial view along the ridge of the warehouse roof, with the line of fixings along the apex
The warehouse roof from the air. Water appearing inside can be entering at almost any point along a roof of this size.
Methodology

Starting with the roof itself, from the air

To safely navigate a fully occupied site, we conducted strict airspace and ground risk assessments prior to flight. By operating from a safe standoff distance and deploying a compact drone with advanced optical zoom, we captured highly detailed surface imagery without bringing the aircraft near the workforce below.

Working that way, the team moved along the roof and recorded the defects that could be responsible for the leaks, capturing detailed imagery of each one as it was found.

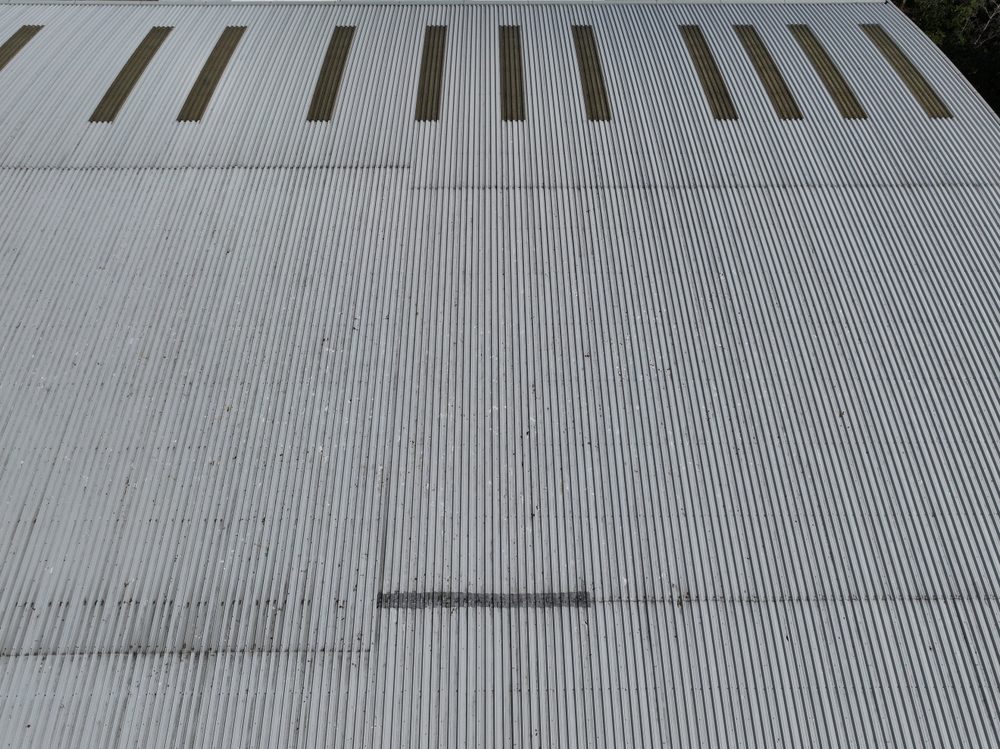
Wide drone view across the warehouse roof, showing the translucent roof panels and rows of fixings running across the sheeting
The roof surface from the air, with the translucent panels visible and the lines of fixings running across the sheeting.
Internal survey

Then from inside, to confirm the exact point of entry

Some of the corrosion and the ingress points were difficult to trace from outside the building. To close that gap, a small drone was flown inside the building itself. Where water had pooled, the drone was taken up close to the roof, at times to within about 15cm of the surface, to capture detailed imagery of the leak point itself.

That proximity turns a general finding into a specific one. Rather than reporting that a section of roof was suspect, the imagery could confirm that a particular fastener was the point of the leak.

Flying inside an occupied building was managed by working in small, isolated areas. A small area would be cordoned off, the drone flown and landed, and the cordon then moved on to the next location. The building stayed in use throughout, and no cherry pickers, mobile elevating work platforms or ladders were needed anywhere on the job.

Findings

What the inspection pinpointed

The inspection identified a number of issues that were considered to be causing the leaks. Each was captured in detail, and the imagery was then processed into a report for the client.

Aged translucent roof panels

Some of the translucent roof panels were now quite aged, and had been weathered by UV and by the weather. Water was leaking through some of those panels.

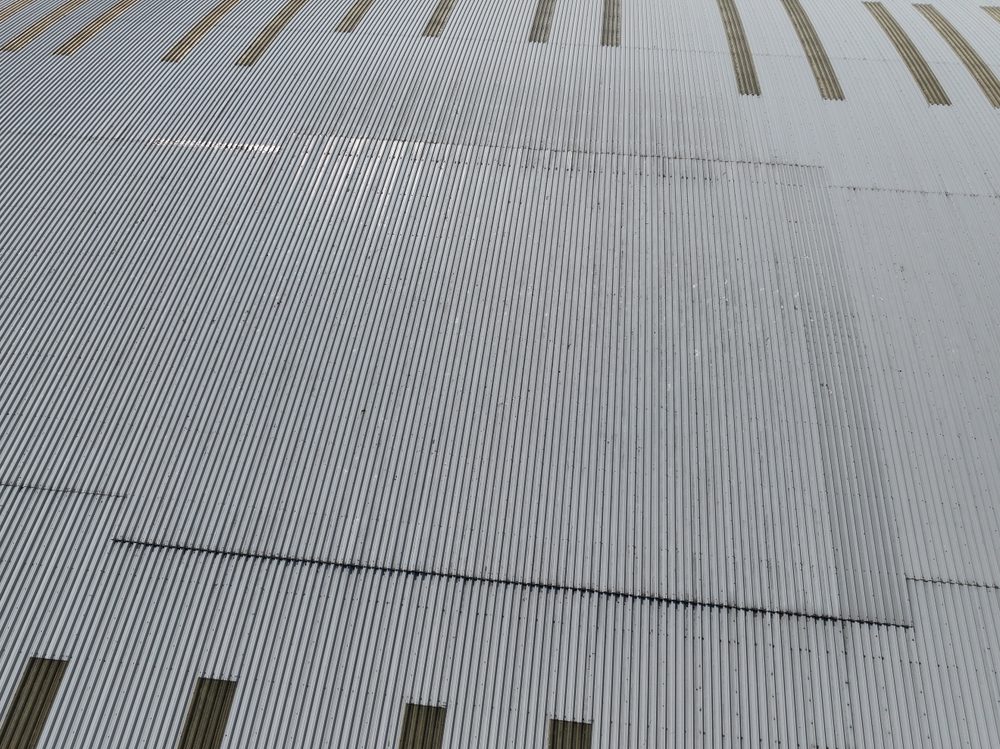
Top-down drone view of the warehouse roof showing rows of aged translucent roof panels set into the sheeting
Rows of translucent roof panels set into the sheeting. These had aged and weathered, and were one of the routes water was taking into the building.

Missing capping at the roof apex

Some capping pieces were missing along the apex of the roof, leaving the top of the ridge exposed rather than covered.

Corrosion around the fixings

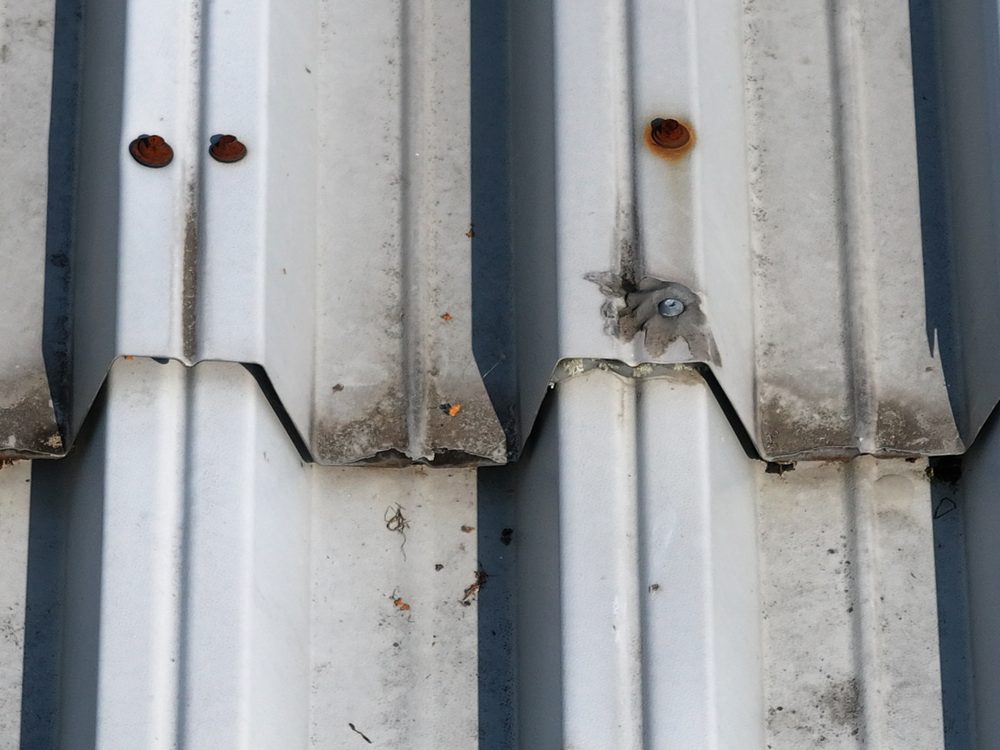
There was corrosion around the fasteners in the sheeting, and water was getting in around them in places.

Close-up drone image of heavily corroded fixing heads on roof sheeting, with rust staining running down the surface
Heavily corroded fixing heads on the sheeting, with rust staining running down the surface below them.

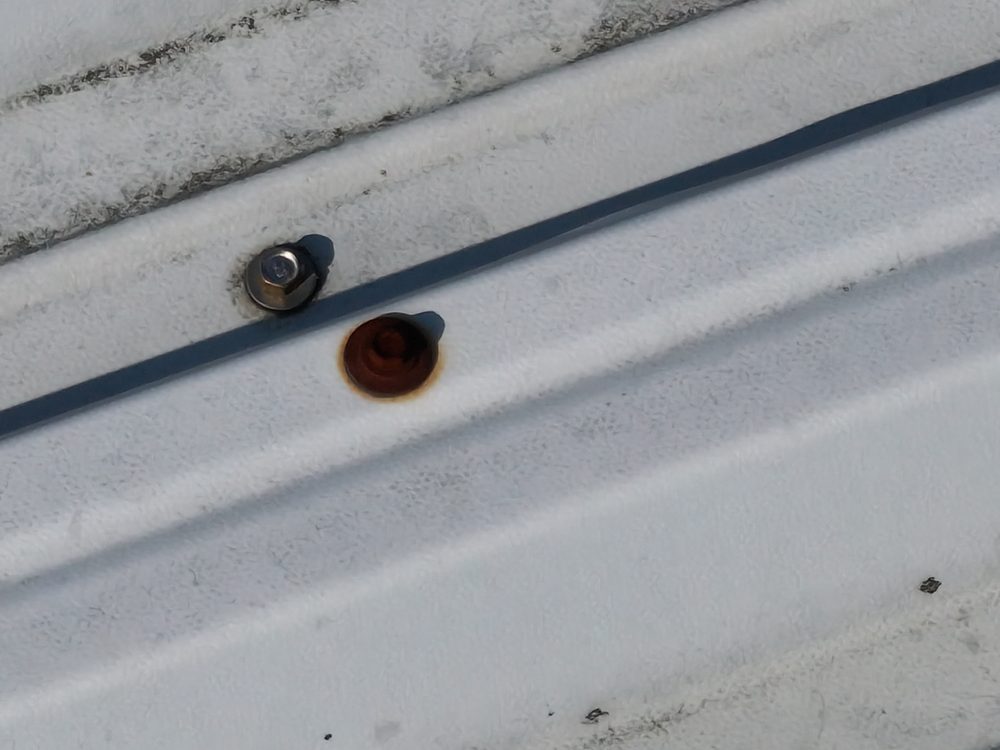
At some fixings, the seal around the fastener had broken down completely, which left nothing to keep water out.

Close-up drone image of two fixings on a roof seam, one with a corroded ring around the fastener
A fixing on a roof seam, with the seal around the fastener corroded away.

Water getting in at the joints and laps

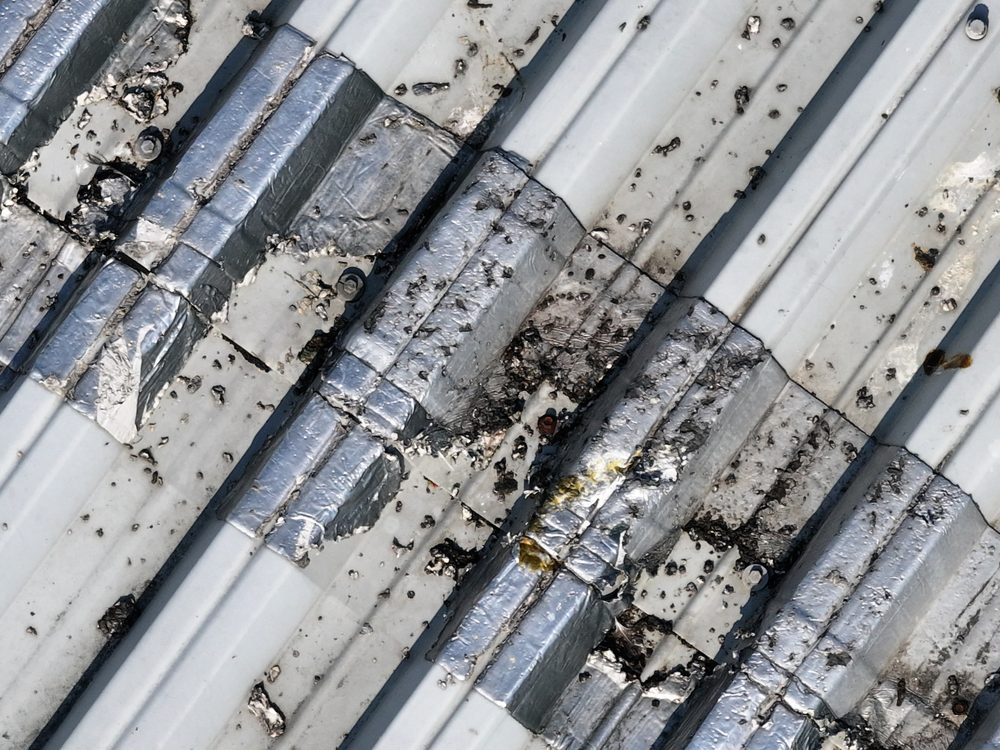
Water was also finding its way in at the joints between sheets, which is what the internal flights were used to confirm.

Close-up drone image of a roof sheet joint covered with aluminium foil tape, with corrosion and a build-up of debris along the joint
Foil tape had been applied over this sheet joint. The tape and the sealant around it had broken down, and debris had collected along the joint.

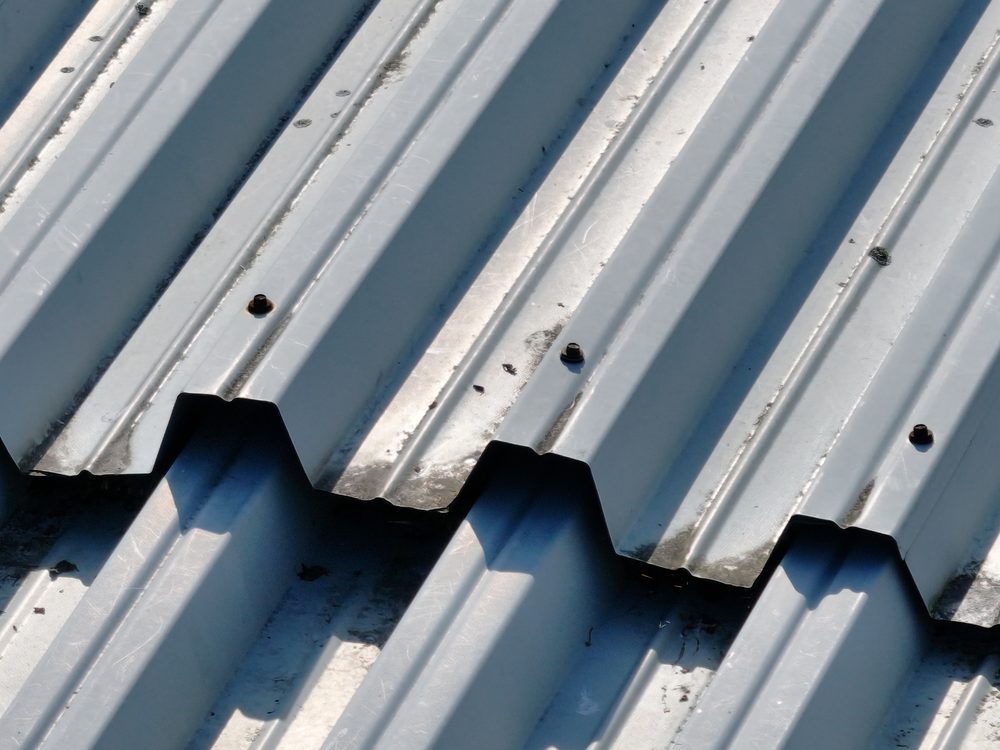
An over-sheet lap left the fixings along the joint exposed, with the sheeting below it already staining.

Close-up drone image of an over-sheet lap on the warehouse roof, showing fixings along the joint and rust staining on the sheeting
An over-sheet lap on the roof, with the fixings along the joint and rust staining on the sheeting below.
Deliverables

What the client received

The captured imagery was processed in the office and put into a report, which was then presented to the client.

Detailed defect imagery

Close imagery of every issue identified on the roof, captured with the drone’s zoom lens and, where necessary, from inside the building.

Verified leak locations

The internal flights confirmed the exact point of ingress at the locations where it was difficult to establish from the roof.

Roof leak report

The findings and imagery were assembled into a report covering the issues considered to be causing the leaks, and presented to the client.

Outcome

Leaks traced to specific, fixable defects

Rather than a general sense that the roof was leaking, the client was left with a defined set of defects: the aged translucent panels, the missing capping at the apex, and the corroded fixings in the sheeting, together with the joints where water was entering. Where the source could not be established from the roof, the internal flights confirmed it.

All of it was done without closing the building, without access equipment, and without asking anyone to leave.

Comparative methodology

Why they chose us

An occupied building with a leaking roof is a difficult survey to carry out by any other means. The drone allowed the roof to be examined in detail from the air, and the leaks to be confirmed from inside, without any access equipment going on site.

Access to the roof
No access equipment vs cherry pickers, platforms or ladders

No cherry pickers, mobile elevating work platforms or ladders were needed to reach the roof at any point.

Continuity of use
Building stayed in use vs closing off parts of the building

Only small isolated areas were cordoned off, one at a time. The building stayed in use while the work was done.

Locating the leaks
Ingress point confirmed vs a general area of roof

The internal flights verified the exact fastener at the point of the leak, where that could not be established from outside.

Efficient option Our method

Using a drone

This is what the job looked like using drone technology.

  • No access equipment on site No cherry pickers, mobile elevating work platforms or ladders were needed to get to the roof.
  • Building stayed in use The building was in use throughout. Small isolated areas were cordoned off one at a time, and nobody was asked to leave.
  • Detail captured from a distance The drone was flown away from the people on site, using the optical zoom to record close detail of the roof surface.
  • Leaks confirmed from inside Where the source was hard to trace from the roof, a second drone was flown internally, at times to within about 15cm of the roof, to verify the exact point of ingress.
  • Detailed imagery of every defect Each issue identified was captured in close detail in the field, then processed into a report and presented to the client.
Project status Reported and delivered
Manned approach Traditional method

Without a drone

What the job would have looked like without drone technology.

  • Access equipment in a live building Getting to the roof would have meant a cherry picker, a mobile elevating work platform or ladders, positioned in and around a building that was in daily use.
  • Working at height over occupied space Someone would have had to get up to roof level and work there to identify the defects first-hand.
  • Tracing the leak from inside Finding the source from inside the building would mean working at height internally, following the water back to where it entered.
  • Views limited to a few fixed positions Working from access equipment means seeing the roof from one position at a time, and moving the equipment around to change the angle.
Operational impact Higher cost and greater risk
Let's talk

Speak to an engineer about your project

Complex surveys and inspections require more than just a pilot. Our engineers can help you scope your requirements and indentify the right approach.

Talk to an engineer

+353 (0)21 202 8281

Quickest for technical scoping

Email your brief

info@engineerswithdrones.ie

Best for sending detailed specs

Next steps

Where to find out more

You can find out more about our drone roof inspections or our building inspections, or read our guide on how to inspect a roof with a drone. Alternatively, you can contact us here to ask what we can do for you.

Last Updated: